
🚀 Installation
Option 1 - From WordPress Directory (Coming Soon)
Option 2 - Manual Installation
- Download the latest version of the plugin as a ZIP file here.
- In WordPress, navigate to Plugins → Add New → Upload Plugin.
- Upload the ZIP file and click Install Now.
- Once installed, click Activate Plugin.

⚙️ Configuration
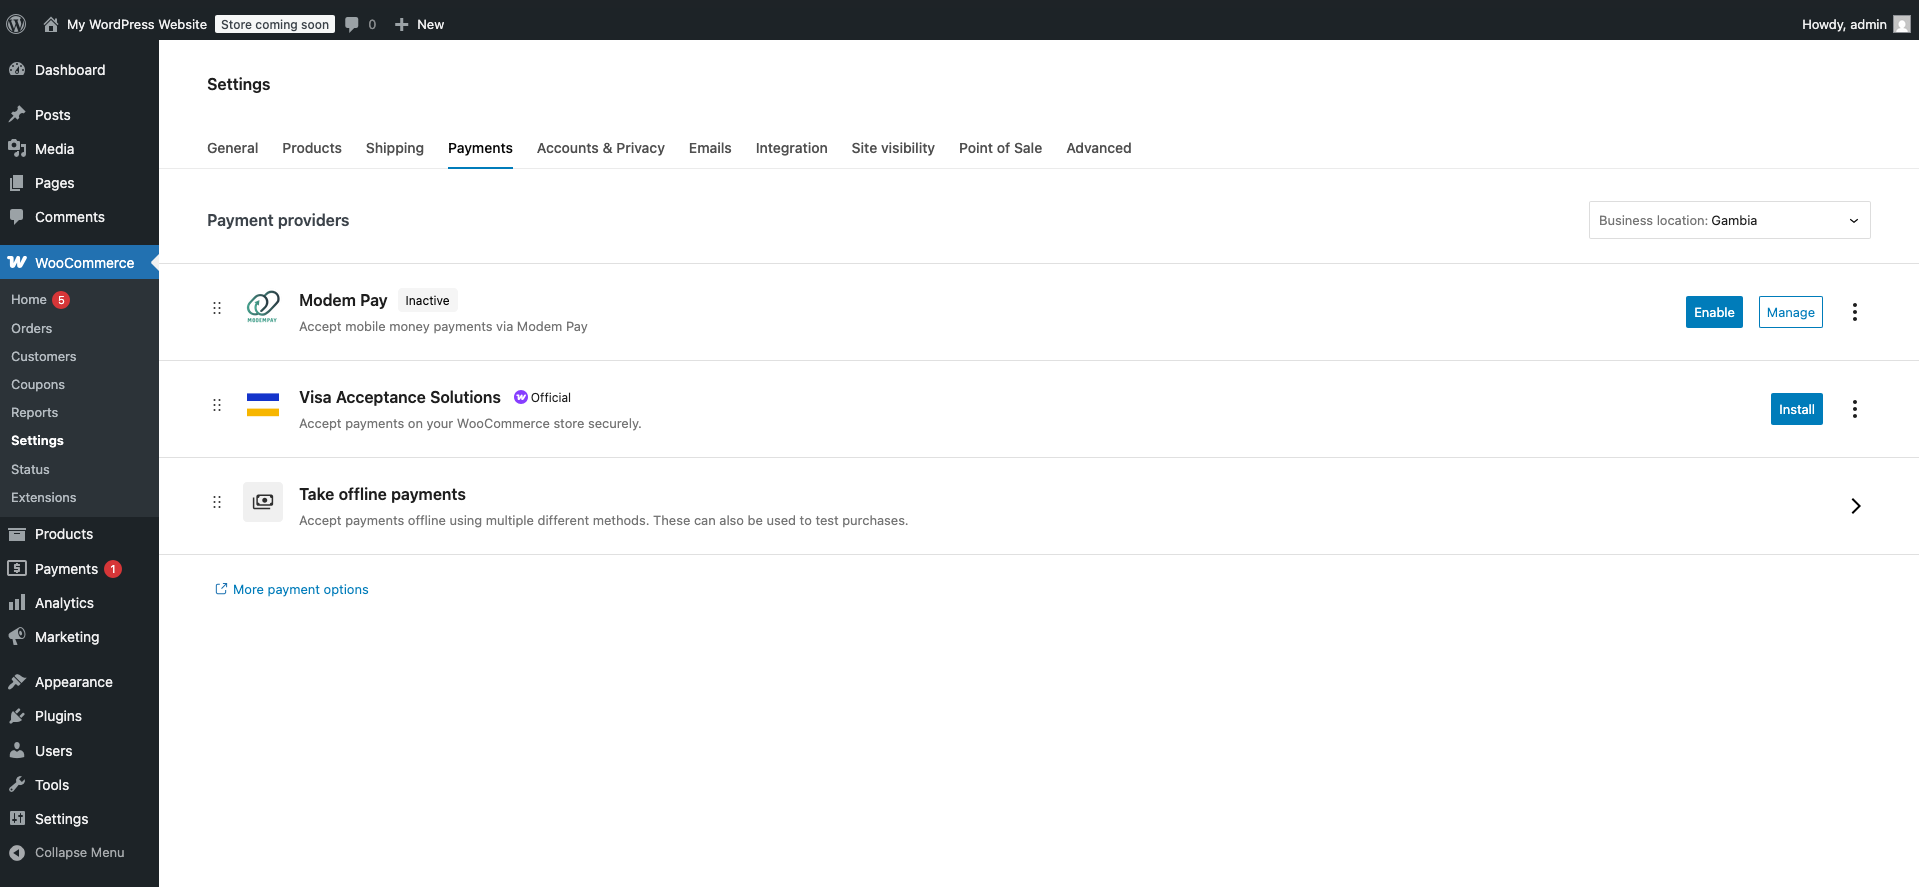
After activation:- Go to WooCommerce → Settings → Payments.
- Find Modem Pay in the list of payment gateways.
- Click Manage to open the settings panel.
🧾 Settings Reference
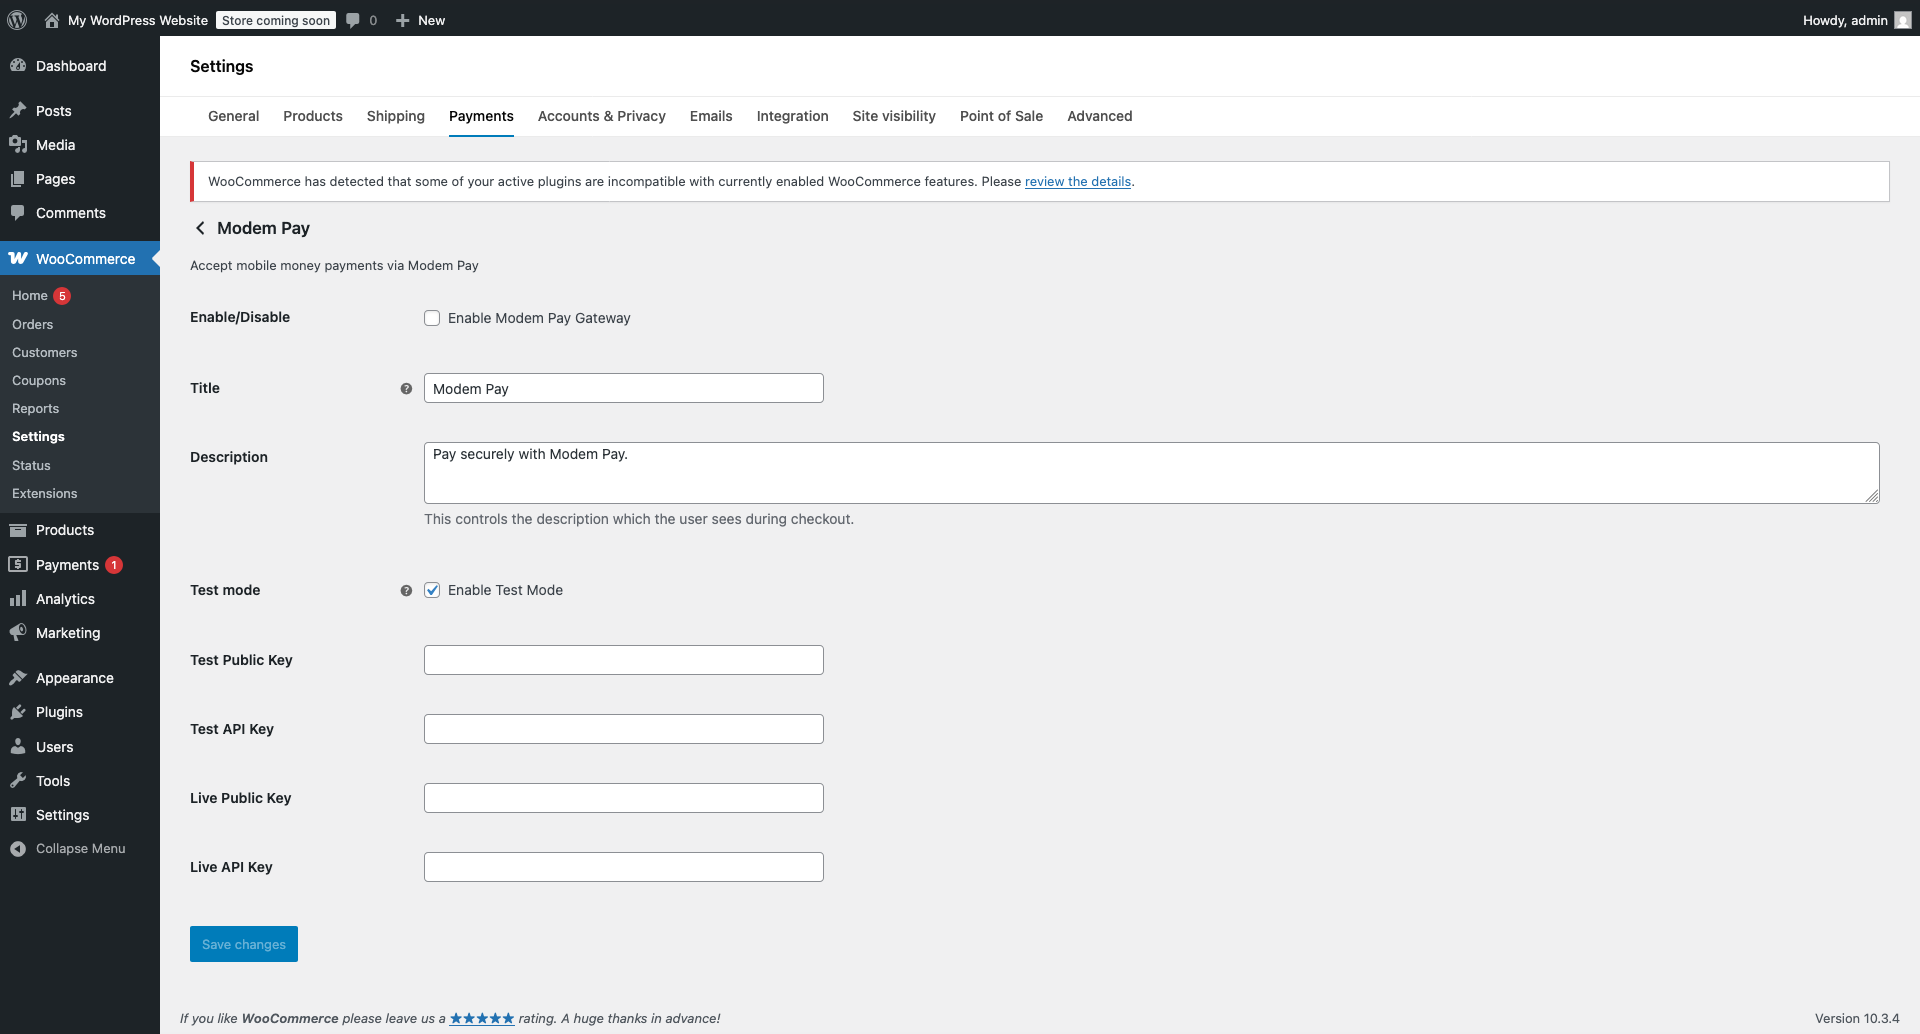
🧠 Setup Steps
- Enable the Modem Pay gateway.
- Set a Title and Description (what users see at checkout).
- Toggle Test Mode while testing integration.
- Enter your Test Keys.
- Save and place a test order.
- Switch off Test Mode, enter your Live Keys, and save again.
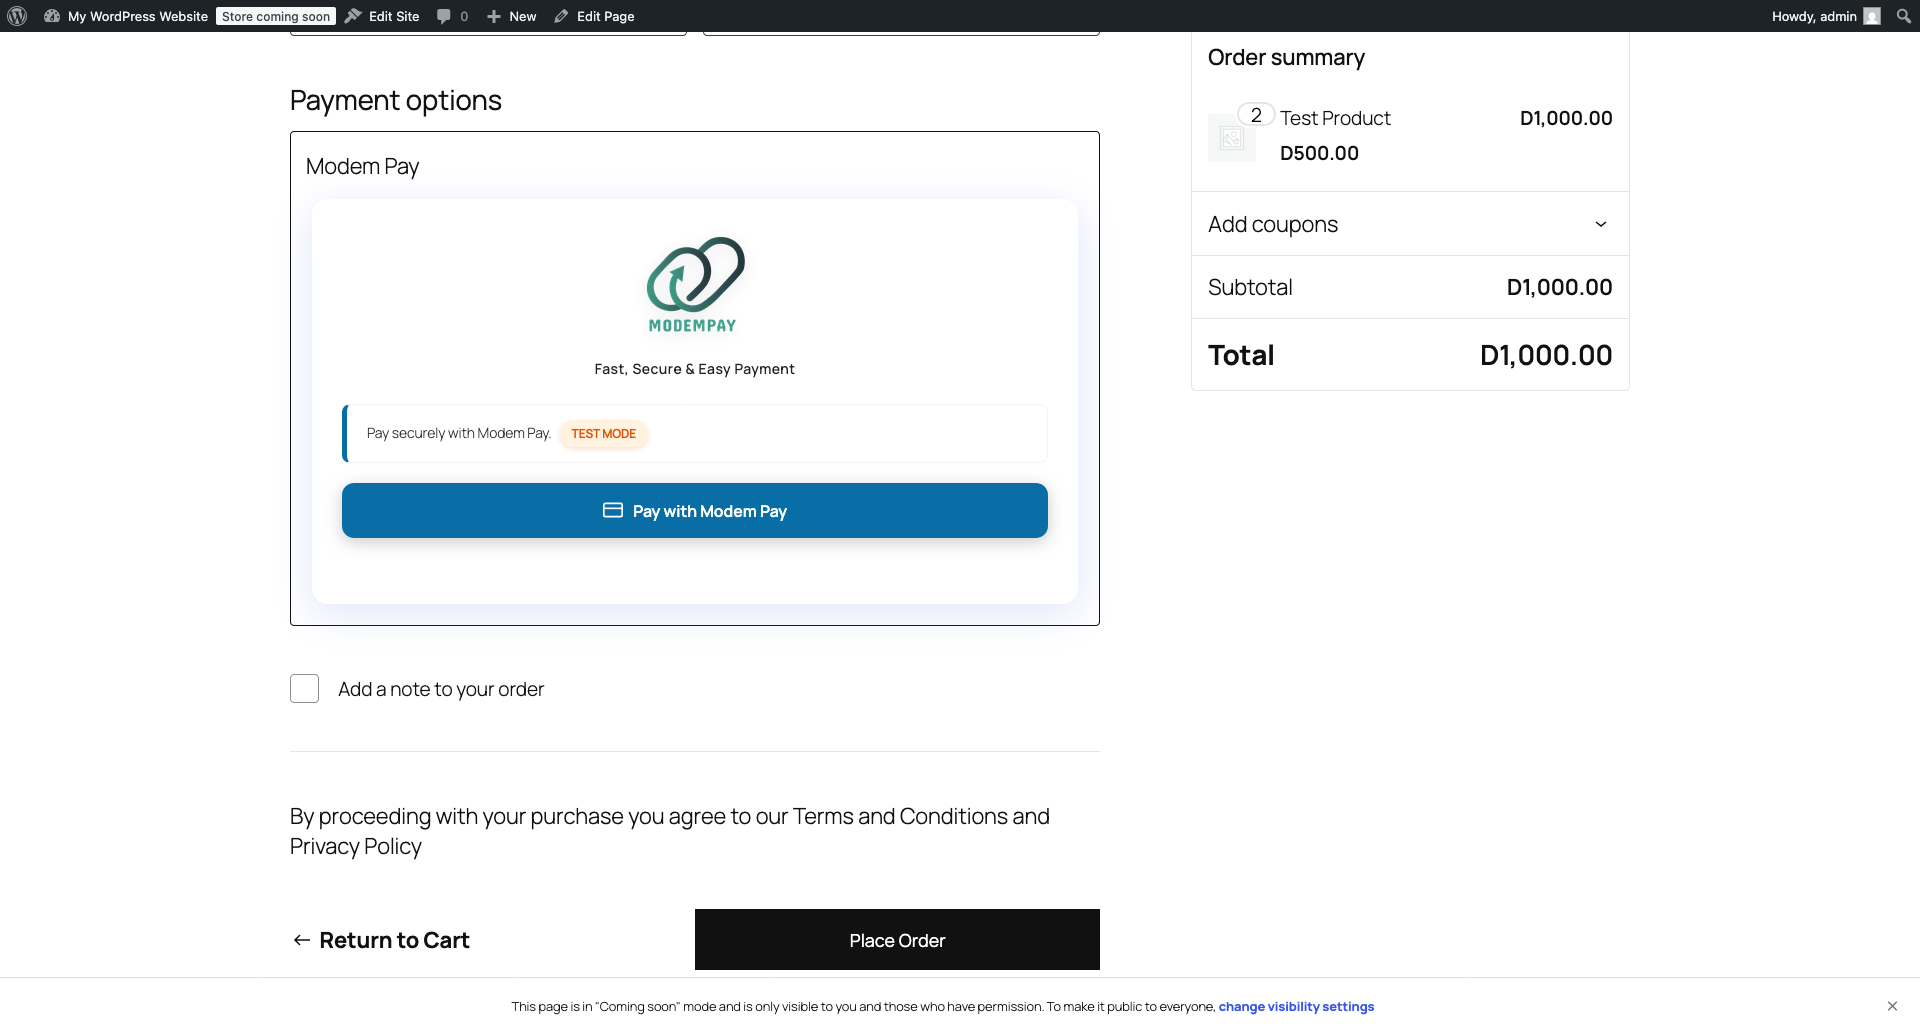
✅ Verify Integration
- Perform a test payment in Test Mode to confirm setup.
- Switch to Live Mode and verify transactions appear in your Modem Pay dashboard.
- If payments fail, double-check your API keys and mode selection.
Make sure you’re using test keys in sandbox mode and live keys in production. Mixing them up is the fastest way to confuse both WooCommerce and yourself.
🧩 Troubleshooting
🏁 Summary
Once configured, Modem Pay appears as a checkout option for customers to complete payments seamlessly via mobile money.It’s fast, secure, and works natively within WooCommerce’s order system.